I bought woodlice on a whim, as you do. This wasn’t quite as random as it sounds, as I do know the basics of looking after them, I already had the stuff to set up a basic tank, and I was thinking of maybe getting some millipedes. But instead, I ended up with woodlice. They have the advantage of being small, so it doesn’t take much space to have a colony.
They’re Porcellio laevis, the swift woodlouse (named because they tend to run pretty fast when things are bad… they’re not ball rollers). They’re Porcellio laevis “Dairy Cow”, a colour/pattern morph kept in the pet trade. They’re mainly white with patches of dark grey, in contrast to the plain grey of most wild ones. I ordered six and ended up with seven. But that’s jumping ahead…
The first step was sorting out a tank. Woodlice need a humid environment, so it’s better to have a tank with less ventilation. Almost all of my tanks are the style with well-ventilated plastic lids. It’s debatable how much ventilation, but I didn’t want to go too low. Very low, such as just drilling a couple of holes, can run risks if fungi or bacteria get going. They’ll use up all the oxygen and the woodlice will suffocate. But my current lid was clearly too much the other way.
I used aquarium sealant to put some net curtain material on the underside of the lid (this is to discourage flies from getting into the tank). I made it bigger than I thought I needed, so I could adjust things with the next step. Then I covered the top with cling film, leaving two holes of about two inches square over the net curtain area.
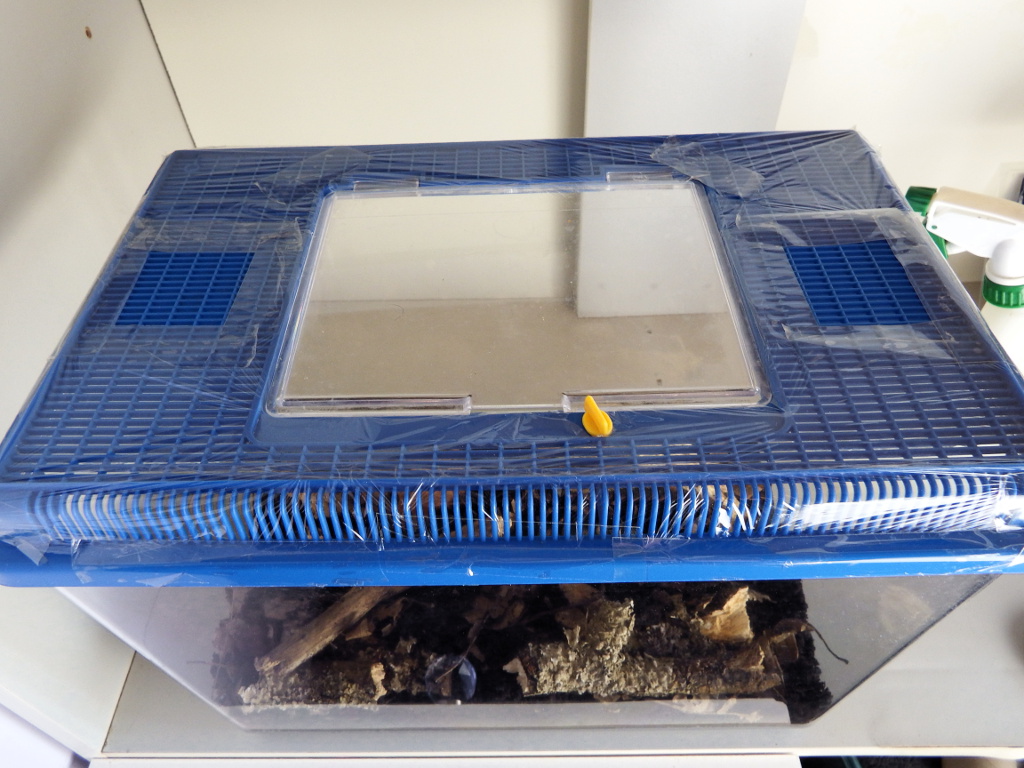
Image Caption: A view of the top of the tank. It’s a blue plastic mesh lid with a clear feeding hatch. Cling film covers most of the top. Two square areas are uncovered on each side, to provide ventilation.
I had some organic compost lying around, so used that to make a layer of two to three inches. Then I covered it with leaf litter and old wood (I baked this before use). I drilled some holes in half a coconut and buried it slightly, so it would be a hide. At the last minute, I remembered I had a cuttlefish bone, so I threw a piece in as a calcium source.
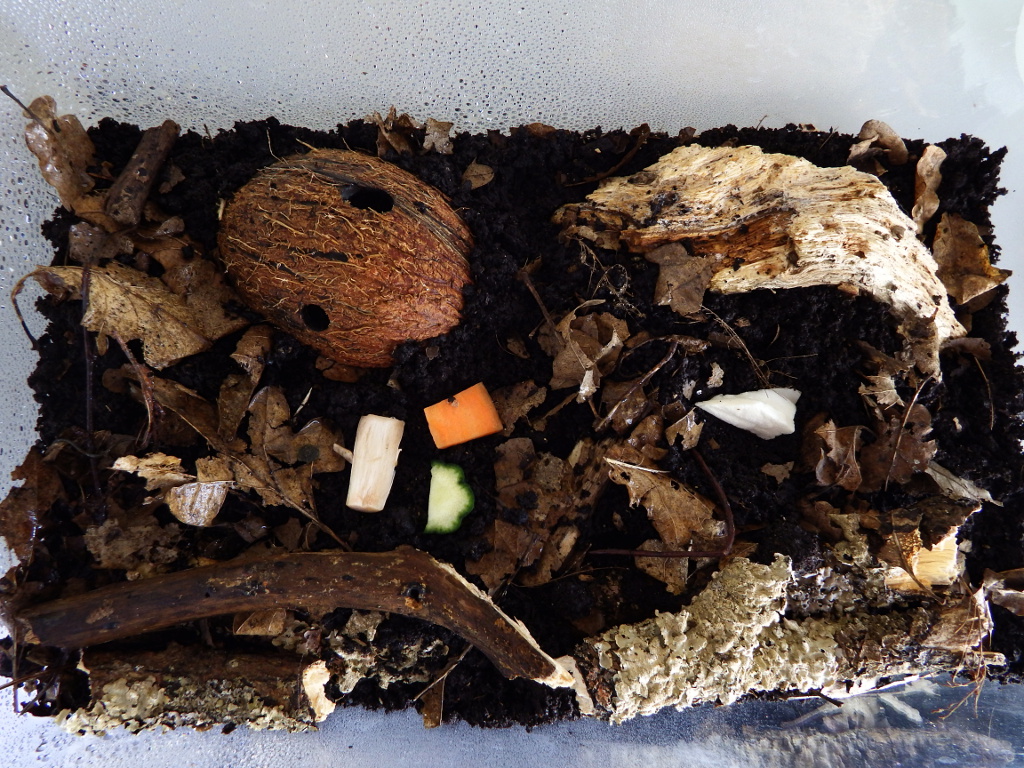
Image Caption: A view of the inside of the tank seen from above. Dark compost is covered in dead leaves and old wood. A coconut with two holes drilled is buried to the right side. The right side also has water droplets and a few pieces of vegetable (sweet potato, mushroom stalk and cucumber). On the left side, there is a white piece of cuttlefish bone, and there’s no water.
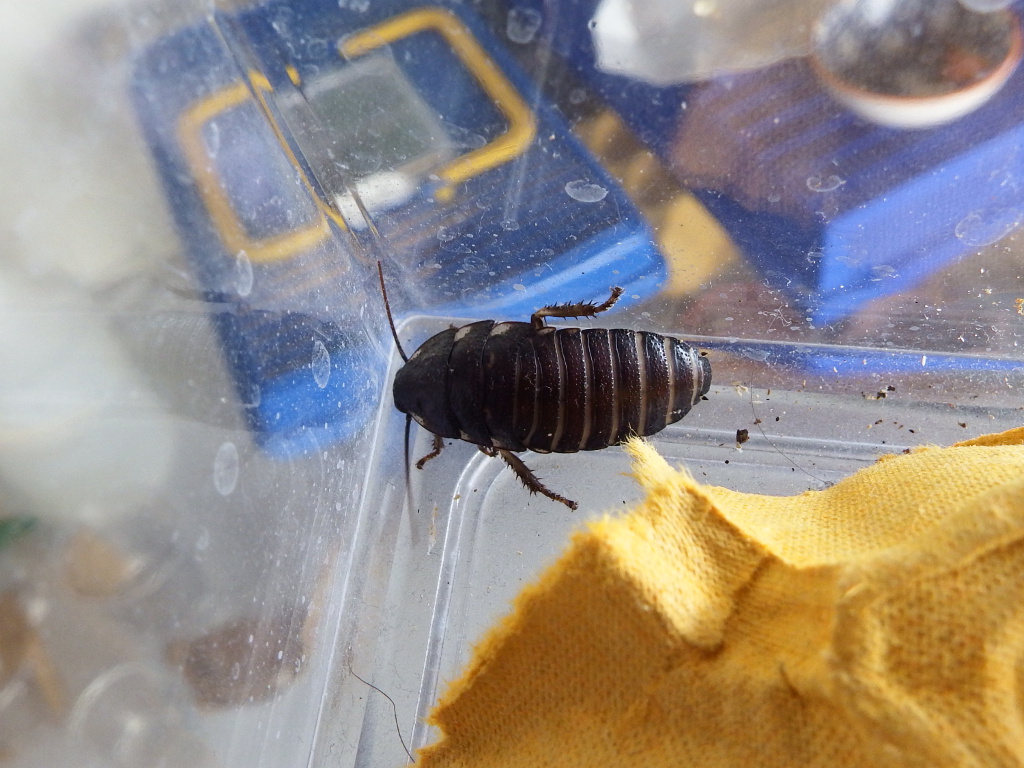
Then the exciting part: the woodlice arrived. I moved them out into a glass pot, so I could check they were fine and take a quick photograph. As they might be breeding, I wanted a record of my founders. The transfer went smoothly and they soon found hiding places.
I did put a thin layer of Vaseline around the top of the tank, to discourage climbing. I’d heard conflicting reports about whether they could climb glass/plastic or not. As it turns out, this species really can’t. They were unable to climb the sides of the plastic pot they came in or the glass pot I used to transfer them.
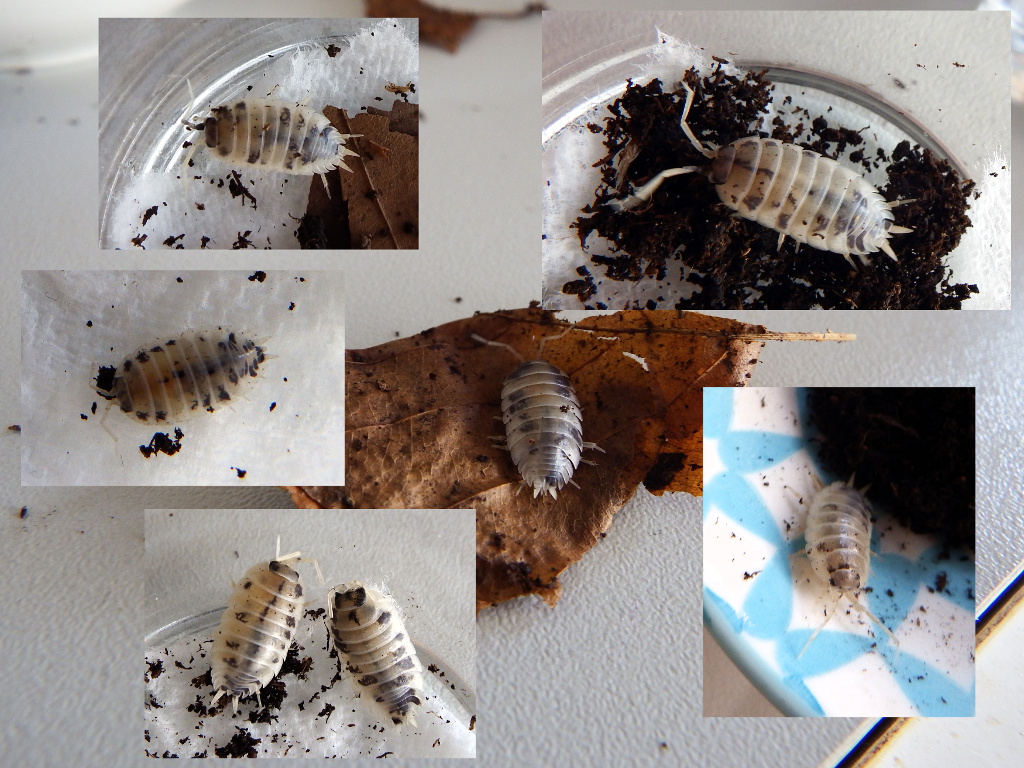
Image Caption: A collage of the seven woodlice, with some dead leaves, soil, and white kitchen roll in view. The woodlice are white with dark grey patches, especially near the edges of their body and in a line down the centre of the body. Some are a little brownish near the front, though others are more pure white. Each one has a unique spot pattern.
I’ve been spraying one side of the tank only, near the coconut, to give them a moisture gradient. I sprayed the first few days, but I think the humidity is about where it needs to be now. I’m aiming to spray once or twice a week. If that doesn’t work, I’ll close the holes down a bit, but it looks like it’s about right at the moment.
It was a tad hot the first few days, though I did see them sometimes at night. Today was a little cooler, meaning that I saw six of the seven out at once. The cuttlefish bone and algae wafers are the current favourite foods. Now, it’s just about waiting for baby woodlice to appear.